Value Statement

Working with you and for you to make your memories last forever.

Like me on Facebook and follow me on Twitter

Showing posts with label photoshop. Show all posts

Thursday, 31 July 2014

Sardis Digital Clickers

I have had a lot of time consumed lately with a new project. Coming in September I will be facilitating a camera club/learning program. Meeting the third Tuesday of every month at Sardis Library, in my home town of Chilliwack BC, we will have fun learning and exploring all aspect of photography.

http://www.fvrl.bc.ca/programs.php?programType=All&fromDate=&status=1&programSearch=Search+for+Programs&library=Sardis&toDate=

So if you want to learn more about how to capture great moments, or some editing techniques, or just want to help others please come down and check it out. Oh and don't forget your coffee/tea and your camera.

For now I will leave you with an image I shot 3 years ago. It was quite dull and bland until I found a mask technique called luminosity masking. Pretty powerful editing style.
Vancouver Skyline

Hope you like it.

Wednesday, 21 May 2014

A new restoration

Hey everybody. Sorry I have been off again as of late. Things have been super hectic, but I wanted to just stop by and post a couple of words and showcase some of my latest restoration work. Feel free to read on about some exciting upcoming things for ChrisTopher Films.

But first. Here are a series of photo restorations I have been contracted to fix. You need to have a passion for this kind of work cause you will never get rich doing it, but the rewards of seeing your clients eyes sparkle with a tear, are sometimes the best reward.


 Take for example this photo from last year that some of you may have seen in A Guide to Restoration also seen on this blog.


This photo had a value to the client that was so big and she had been told by several other restoration outlets it was impossible to restore. She wasn't looking for a high res digital photo; she just wanted to see her children when they were babies again.


Now this next photo was entirely different. Look very closely at the banner and you will see the photo was taken in 1901. This client entrusted to me, over anybody else, a photo that is 113 years old. Every time I moved it I had to ensure it remained rigid and flat as it was crumbling, soon to be lost forever. Now it can be printed over and over again.


Finally my latest which I have had for quite some time. I know nothing about the photo or the family who it will go to. It is a gift from one friend to another and I truly hope they like it.


Oh and the big news. Starting in September I will be hosting with support from Sardis Public Library and Fraser Valley Regional Library a new drop in camera club. My goal is to do in person what my attempts are to do on this blog, learn and educate from and for likeminded photographers in Chilliwack and the Fraser Valley

Monday, 27 January 2014

Seven Steps To Lightroom Magic

With the recent release of Abobe Lightroom 5 for a mere $149.95 the amateur photographer now has the ability to enhance and improve a photo in the comfort of their own home. Lightroom is really the digital equivalent to a chemical darkroom back when we all shot with film. The enhancements that were done in the darkroom would improve exposure, clarity, contrast, pretty much everything you can now do in Lightroom. Let me take you through the steps I go through with most of the photos I create.


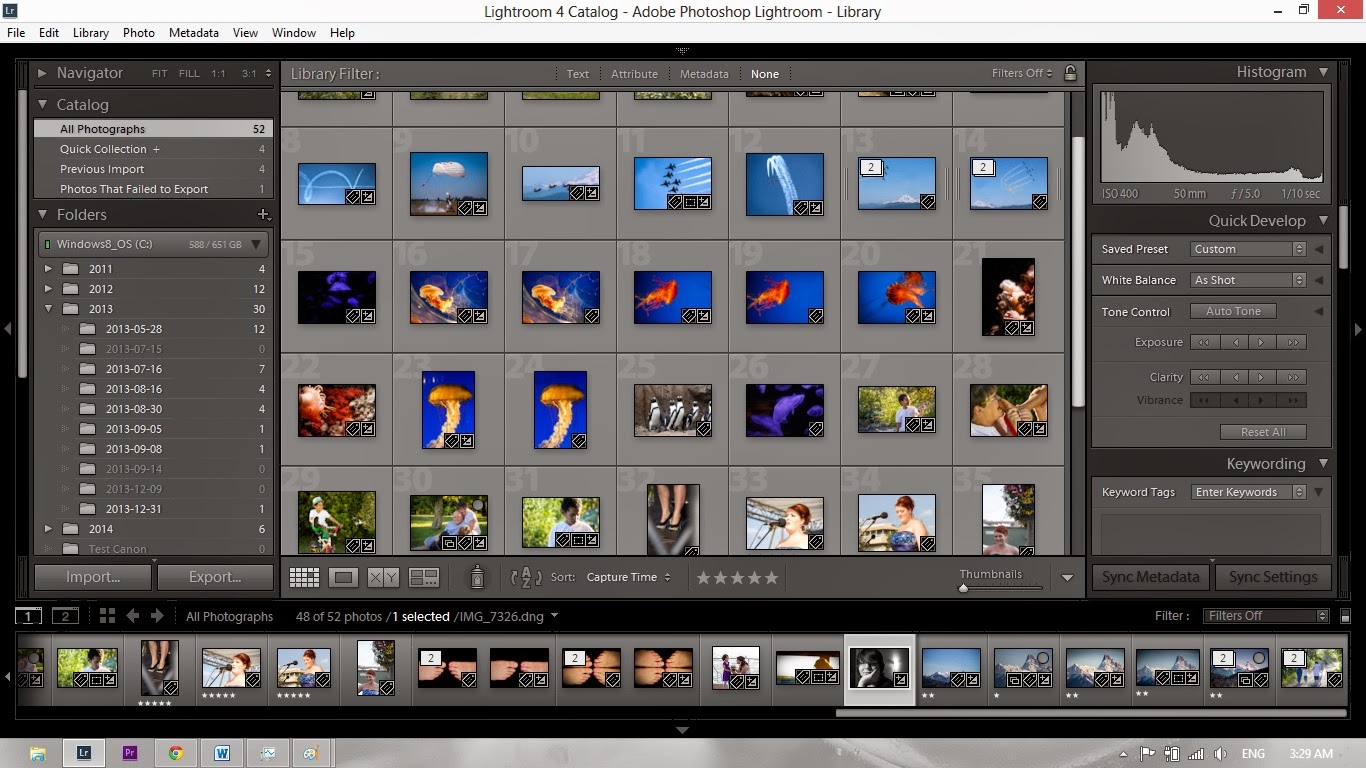
Here is a shot of my Lightroom catalogue. From this catalogue I can search for photos using a variety of methods from keyword searching, to star rating, and a host of other ways. Once I identify photos I would like to edit it's as simple as highlight them and click the develop tab.


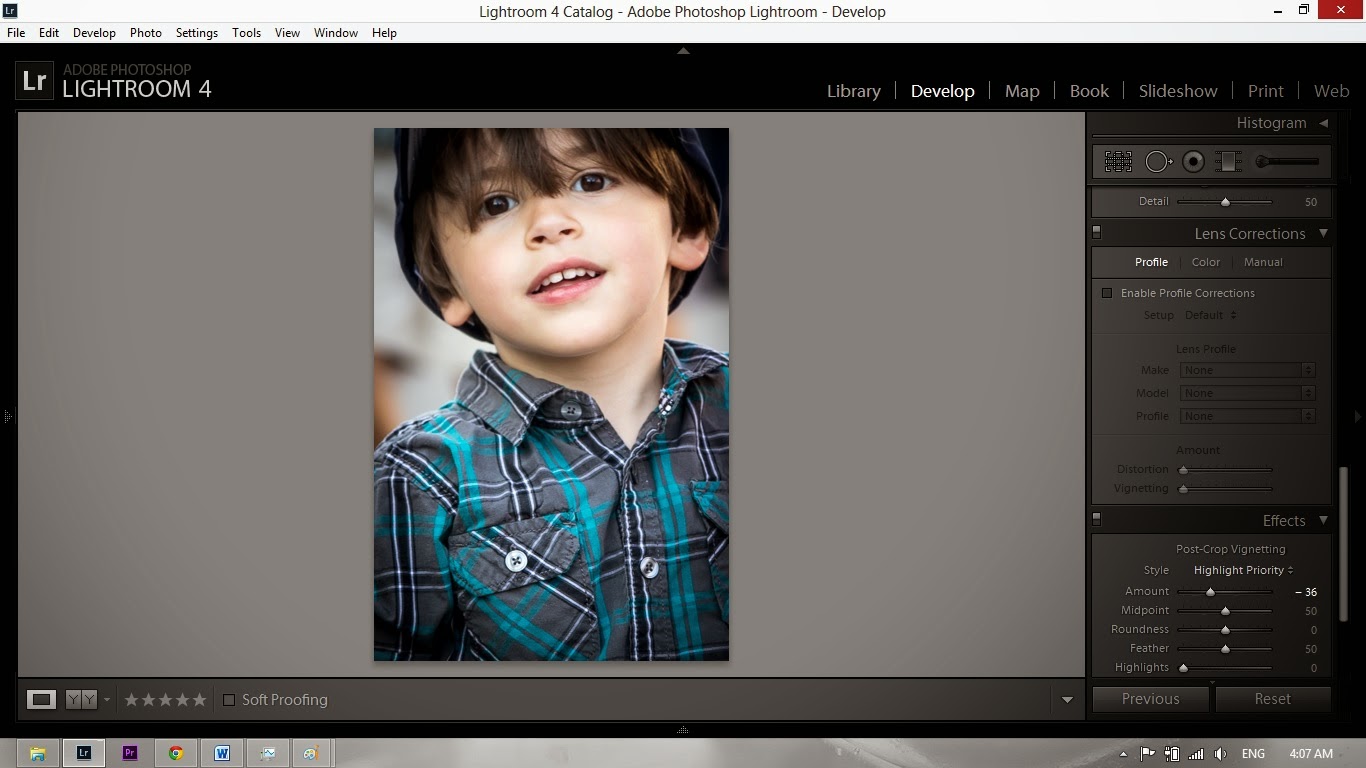
To the right is the first view you get when entering Lightrooms develop module. You will have a series of thumbnails across the bottom and the thumbnail you want to work on is highlighted and appears in the main viewing area. The photo you see here has not been altered from the original in camera shot.


Down the right side of the work palette you will see the basic menu where you will begin tweaking your photo from good to great. It is important to remember that the path to a great photo is starting with a great foundation and looking at the photo I am working on it has the right recipe. The composition I really like, the lighting and exposure is very good and now to make a few fine tuning adjustments.


I like to start with the highlights, shadows, whites, and blacks, in that order. I will make adjustments using the sliders and when I work the whites and blacks I use Alt while adjusting them. This makes the screen appear black and when I start to "Clip" (a phrase used when ever or under exposing)the blacks or whites it shows on the screen.


You see how the adjustment sliders have been altered and now the photo has a little more punch. I think it's on its way to a great portrait. Next a little clarity and variance.


Here is the portrait after clarity and hue have been adjusted. The third slider in this grouping is saturation. I tend to avoid using this slider as I feel that when the photo is printed the colour tends to become quite garish and unreal.


Now that we have made these adjustments we can sharpen and vignette the photo giving it a clear definition and a little artistic feel.


Before
After
And here it is the finished product. All the changes made to this photo were done in Lightroom and I have done these same adjustments in my darkroom, when I still shot film. People argue that by doing this enhancement you are not staying pure to the original picture, however there is no difference between what was done here in Lightroom and what I used to do in my darkroom. Your photos can be far better with just a few moments of time and a little tweaking here and there. It is no different than what photographers have been doing since the beginnings of time.


Thursday, 15 August 2013

A Bit of a Guide to Photo Restoration

A few weeks ago, a colleague of mine was lamenting that she had a damaged photo, and that she could not find anyone to restore it. One of the people she was talking to suggested talking to me, and I found myself taking on a new and interesting project. 

Usually I like to suggest locations for photographs, or talk about how to get that special shot, but sometimes the work you put into a photo after the fact is just as important. That being said, I believe that the more careful you are creating and composing your original shot the better the quality and the less post production you need to do. For the most part I use Lightroom for a bit of white balance correction, perhaps a bit of crop. If I think the exposure is a bit off, I might play by a stop or two. I can do the basic functions, and I have fun fiddling with the levels (sometimes with surprisingly neat results), but Photoshop is not a strength of mine by any means. When she asked me to take a look at the damaged photo, I was a little hesitant but also excited to try out old tools in a new way.

The first thing I have to note about taking on a restoration project, however, is to be completely frank about your expectations. I was up front and said I would give it a shot, but could not guarantee the final output quality. Thanks to Photoshop, Even if you're attempting to restore a photo for the first time, at least there's no chance of harming the original.


A few days after accepting the job, this is the photo I received.

This is a Polaroid photo of her children who I believe are in their early 30s now, making this Polaroid over 25 years old. It is sun-bleached, where it sat in some sort of frame, and has burn holes and stains embedded into it. As soon as I saw it, I understood why no other restoration place was willing to take this on, but because of the working relationship I had with the client, and since I'd already stressed to her that there were no promises about the result, I thought I would give it a whirl.

The first thing I did is scan at 2400 DPI (the highest setting on my scanner) to create as much information on the photo as I could and smooth out some grain, then the work began. I did a quick crop to get rid of the boarders, including the darker sides, did a lot of colour correction and dodge and burn to change exposure in specific areas. Finally, I super enlarged the photo to use the clone tool to "heal" some areas by replacing damaged areas with a similar colour from nearby healthy areas on a pixel by pixel basis. 


This image was the result. Not so bad, now, is it?

I am sure there are Photoshop artists out there who could have re-conditioned the entire photo, but even though this way is not perfect, it still has that early 70s Polaroid.

Scanning the original at such a high resolution and healing with a pixel by pixel process also meant that I was able to enlarge the original, so the client was able to print out a larger version as a 4x5.
After delivery, the owner of the photo was in tears. She couldn't believe that the photo, which was so dear to her, was brought back to this type of quality. I didn't have the heart to tell her the reason no other photo refinisher/restorer would touch it was because she wouldn't have wanted to pay for the nearly 14 hours of work that this photo took; it probably would have cost her several hundred dollars.

But part of being a part-time photo geek means that I have the time to fool around with projects like this when it suits me, without worrying about putting bread on the table. This project does give a good example of how much you can do in restoration work. 

Do you have a restoration project you would like to share? Leave a link in the comments below! I would love to see what others are up to and maybe offer some tips and tricks for specific projects if you're stumped about something.